

How To Repair A Rear Car Light With A Hole
One time the sun sets, our tail lights are used to alert drivers behind us of our presence on the route. However, one of the most frustrating situations a commuter can confront is when those lights don't work equally well as they should. Typically, these bug are related to condensation inside the calorie-free housing. It'south extremely rare for water or condensation to find its fashion inside of a tail calorie-free, but it does happen occasionally.
Whether information technology'southward due to a broken seal or a fissure in the tail low-cal itself, condensation inside of a tail low-cal can prematurely wear out the light, fire the seedling and make the light useless. The near common source of water leaking within of a tail lite is when the seal that is designed to protect the interior parts from outside elements breaks, allowing water or condensation to class on the inside of the light.
Role one of 1: Removing water from the tail light
Materials Needed
- Boxed end wrench or ratchet wrench
- Flashlight
- Heat gun or hair dryer
- Marking
- Needle nose pliers
- Replacement tail lite seal
- Replacement light bulb
- Safety equipment (rubber glasses & gloves)
- Screwdrivers (apartment and Phillips head)
- Foursquare cardboard box and a flat piece of cardboard the aforementioned width as the box
- Waterproof silicone
Step 1: Disconnect the vehicle's bombardment. Before removing any parts, locate the vehicle's battery and disconnect the positive and negative battery cables.
- Note: This step should always be the kickoff affair you exercise when you work on whatever vehicle.

Step 2: Remove the tail light. To remove the calorie-free, follow the exact steps listed in your vehicle service manual.
The instructions listed beneath are general steps for removing the tail light on most vehicles:
-
Remove any covers that are behind the low-cal in question.
-
Remove the electrical harness or low-cal bulb "pigtail" from the light.
-
Remove whatsoever clips or bolts that are securing the light to the vehicle. To remove these clips, use a pair of needle nose pliers and press down or pull up on the prune depending on the location of the attachment.
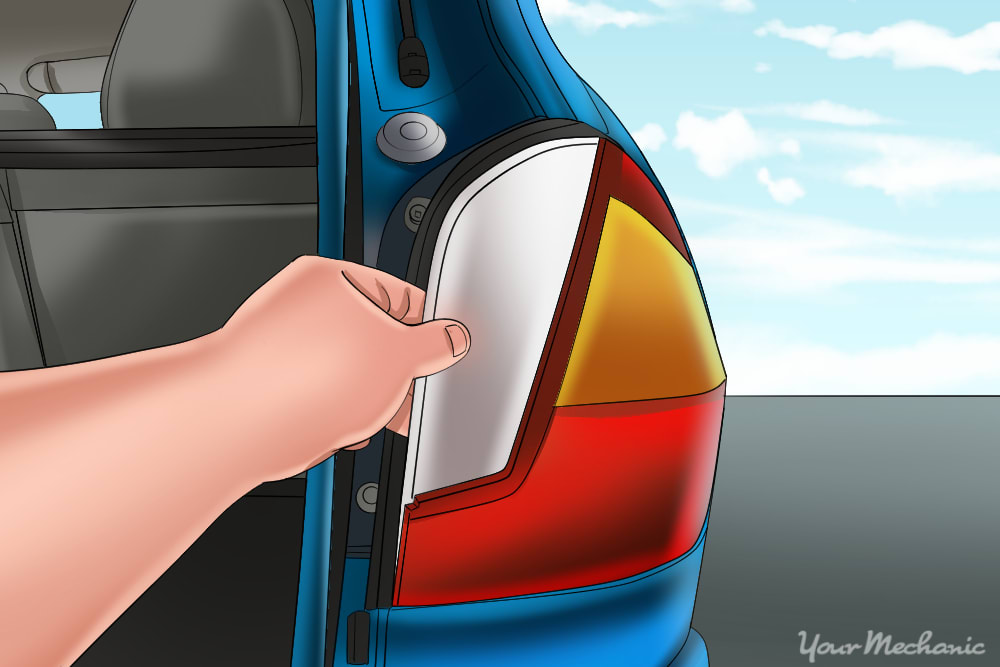
Step 3: Remove the tail light from the vehicle. One time the clips or bolts accept been disconnected from the low-cal, you'll need to remove it from the vehicle.
Simply pull the low-cal with ii easily, making sure that any electrical harnesses have been removed from the light housing.
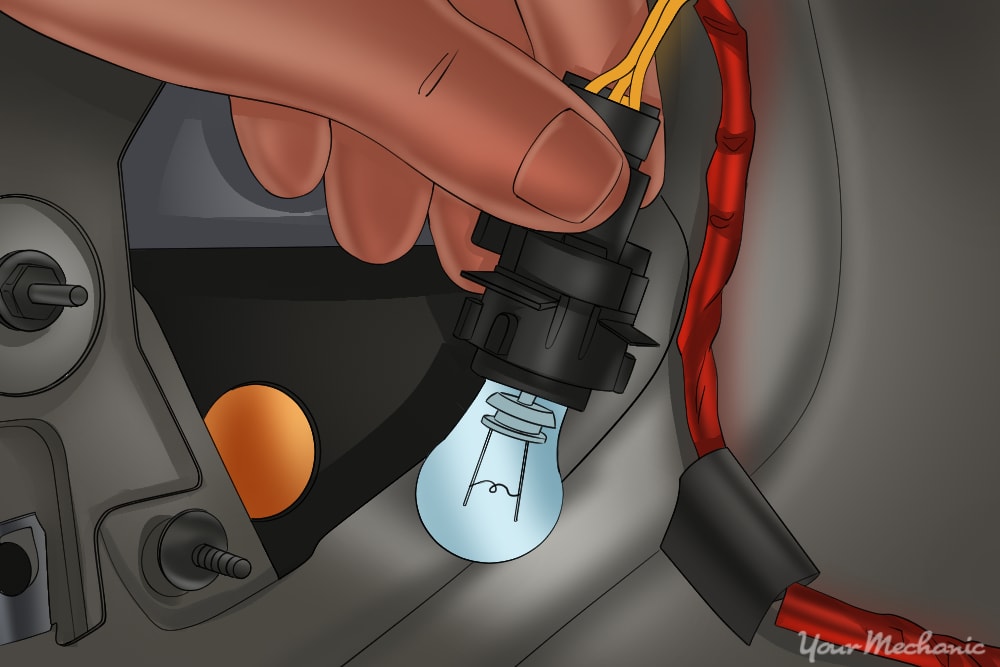
Step four: Remove the light bulb. Later the tail lite has been removed from the vehicle, you'll need to remove the light bulb inside.
To achieve this step, follow the instructions listed in your vehicle service manual.
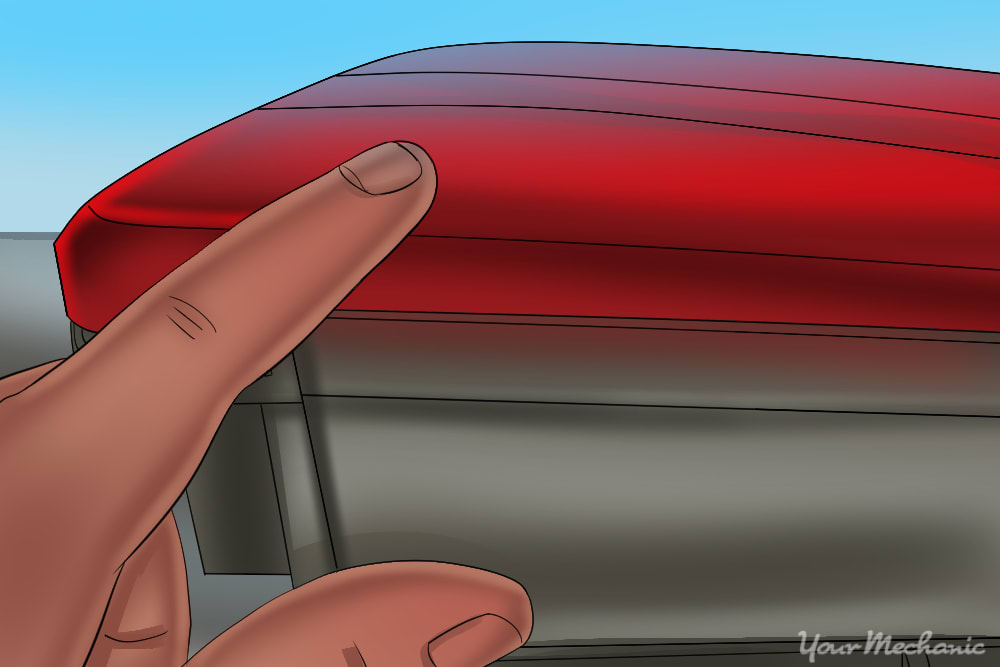
Step 5: Look for the source of the leak. The paradigm above shows the location of the seal between the outer cover and the inner cover.
This seal tends to wear out due to exposure to elements such every bit sun, hot weather or cold weather climates.
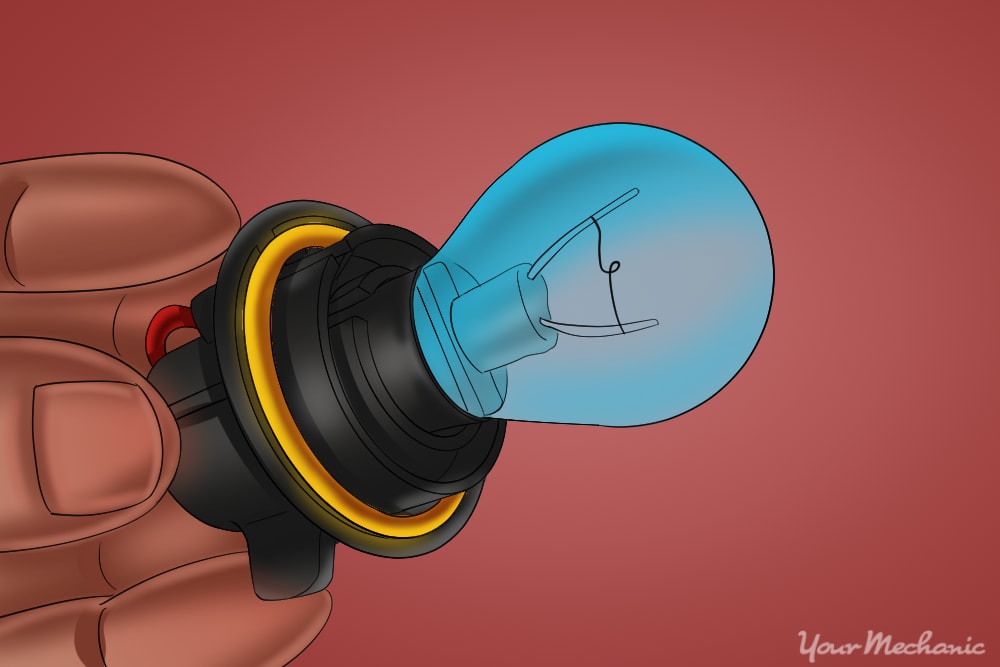
The other source of the leak may exist coming from the lite bulb itself. In the image above, you tin can see an orange O-Ring, which is pressed within the housing where the light bulb inserts to the tail light.
Sometimes this O-Ring will be pinched, frayed or damaged, which causes water to seep into the tail lite. If the seal is damaged, you need to buy a new light bulb and O-Ring and reinstall.
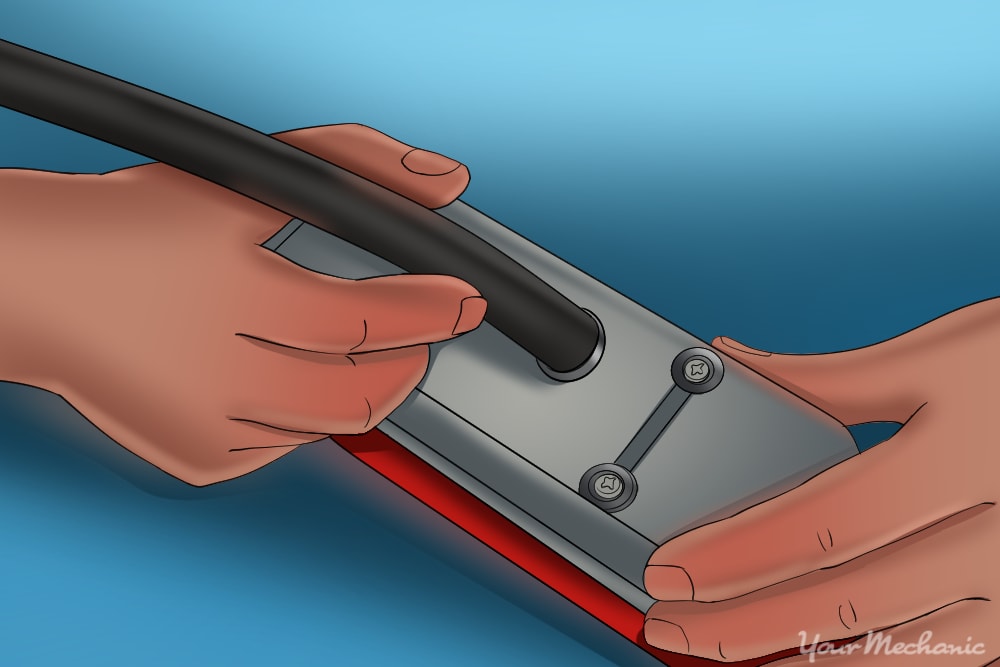
Footstep 6: Fill the lite housing with h2o. Once all electrical components have been removed from the tail calorie-free, a good style to find the source of the leak is to fill information technology with h2o and pressure examination the housing.
Make full the low-cal housing with water, and wipe all residual water from the outside edges (especially where the seal is located). Using either an air hose connection or your mouth, blow air into the housing and look for air bubbles or water coming from the seals.
In the image higher up, you can encounter that bubbles are being forced from the seal. Once you lot find the expanse that is leaking, marker the starting and catastrophe locations with a marker. This will tell you where to use caulking to seal the leaking gasket.
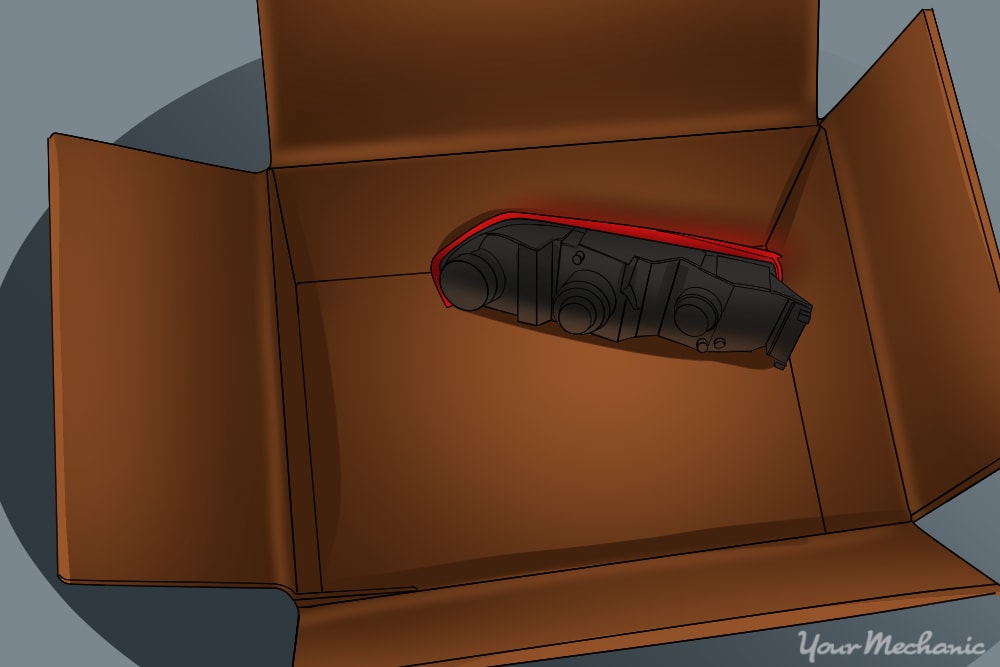
Step 7: Dry the inside of the tail calorie-free. The all-time method to remove condensation from the within of a tail light is the indirect drying method.
Put the tail light in a cardboard box with a top. Refer to the epitome above for an example of this setup.
Basically, all you want to practice is place the tail light inside of a cardboard box with the open up hole where the light seedling is inserted facing towards the back.
In one case the low-cal is inside the box, cutting a round pigsty the same diameter as the end of a heat gun or hair dryer on the other side of the cardboard box. Insert the tip of the heat gun through the hole.
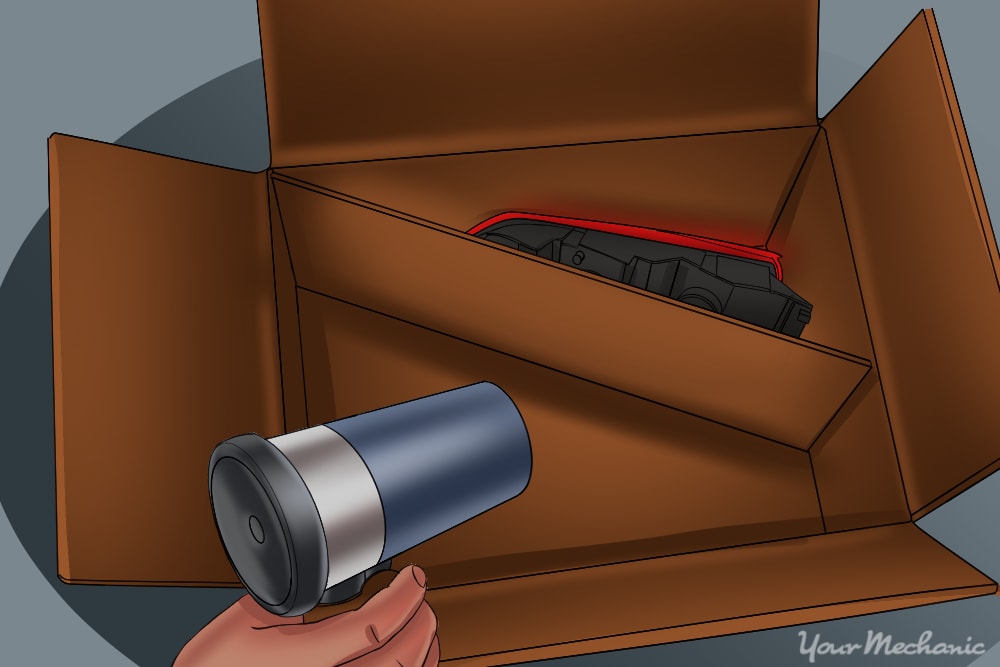
Y'all don't want to have direct rut on the tail light, equally the plastic housing may cook. To avoid this, place a piece of cardboard or heavy paper in between the light and the heat gun. Refer to the image above.
Once everything is set in identify, turn your heat gun or pilus dryer to the lowest setting. Close the lid of the box and place a small-scale piece of record over the chapeau. After running it for 5 to 10 minutes, check the tail light to see if the condensation has been removed. If not, look a few minutes more, but do non let the heat gun run for more than than twenty minutes.
Step viii: Repair the leak. One time the tail light has been cleared of condensation, you lot'll have to decide how to repair the damaged seal.
Most car owners will cull to utilise a waterproof caulking compound to seal the gasket. Others determine to take the headlight or tail light completely autonomously and replace the unabridged seal.
The method for completing this pace will vary based on the materials you use. However, if you're using a waterproof silicone, the instructions are rather simple.
Run a small-scale bead of silicone forth the border of the seal. Using your finger, smoothen out the dewdrop and brand sure to piece of work the silicone inside the cracks of the gasket or seal. Permit the silicone harden overnight.
Step 9: Reinstall the repaired tail light. But reverse the installation instructions to reinstall the tail light or follow your service manual instructions.
These are general steps for reinstalling a tail light:
-
Insert the new light bulb and securely fasten the lite bulb to the dorsum of the tail calorie-free.
-
Insert the tail light into the housing.
-
Tighten all clips or bolts that hold the tail lite onto the vehicle.
-
Secure any electrical harnesses and reinstall any covers that were removed.
If you've read these instructions and yet don't feel 100% confident in completing this repair, please contact one of the local ASE certified mechanics from YourMechanic to complete the tail light lens replacement job for you.
The statements expressed above are only for informational purposes and should be independently verified. Please see our terms of service for more details

Source: https://www.yourmechanic.com/article/how-to-remove-water-from-a-tail-light-by-timothy-charlet
Posted by: goodopmenow.blogspot.com
0 Response to "How To Repair A Rear Car Light With A Hole"
Post a Comment