

Can Forged Anvils Be Welded To Repair Crushed Corners
If you lot've just bought your get-go anvil, you might be wondering how to repair or restore it. Near anvils are bought used and come with cracks, dents, and chips from years of use.
How do yous repair an anvil? The most common ways to repair or restore an anvil are by either grinding down the surface, welding any missing areas, or both. However, if you're a make new blacksmith so trying to repair your start anvil can ofttimes practice much more harm than good.
If your anvil only has pocket-sized impairment, effort working around it. If an anvil yous're because buying has significant damage, mayhap you should only motility on and find some other anvil instead.
In this commodity I'll explain why you might desire to repair an anvil. I'll go into detail about why repairing an anvil isn't always a bully idea, likewise every bit discussing some means to fix cracks and edges if you determine to go alee with information technology. Finally, I'll share some tips to assist intendance and maintain your anvil to proceed it in practiced status for years to come up.
Why Would An Anvil Need Repair?
There are many reasons why an anvil may legitimately need repair, as well as reasons why people might think an anvil needs to be repaired when that isn't really the case.
Chips, cracks, grooves, pitting, and dents tin can brand an one-time anvil look really worn and damaged. Simply in many cases, the damage is purely artful and won't really impact your piece of work.
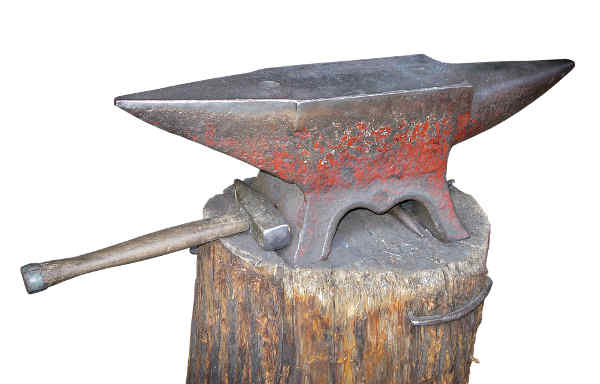
The main areas where new blacksmiths might exist worried about damage on their anvil is the face (the flat top surface where well-nigh of your blacksmithing work is done), and the horn (where most angle work is done.)
Blacksmiths might also worry about rust or patina on their anvils and desire to remove information technology also.
Anvils Are Somewhat Cocky-Repairing If Y'all Just Use Them
A lot of minor imperfections in your anvil will go naturally worked out just by using your anvil.
Sharp edges will beginning to get worn smooth. And hot steel will quickly outset to remove rust from your anvil.
Sometimes the all-time mode to set pocket-size impairment or imperfections in your anvil is but to start using information technology. The constant pounding and heat will really commencement to make everything pretty apartment and uniform shortly.
Think Advisedly: Practice You Really NEED To Repair It?
Similar I said earlier, chances are that trying to fix your anvil will exercise more harm than practiced.
If you try to "set" it and screw up, information technology tin can be a lot harder to "united nations-fix" it later on.
Most anvils withal have plenty of working life left in them without whatever kind of repairs.
Good blacksmithing isn't nearly using tools that are in pristine status, it's all virtually your skill every bit a blacksmith. A master blacksmith can brand do fifty-fifty with sub-par tools.
Even if you spend the time and money to get your anvil welded upwards correct, you're probable to still damage and scrap it once again as a new blacksmith while you lot're still learning.
Minor Restoration Work
If you lot simply want to clean your anvil up and make it await a bit nicer, I'd recommend taking a wire castor to it and removing some of the rust from the surface. This can give your anvil a more iron/steel color. Although I'd still probably leave the face of the anvil and let hot metallic and scale to naturally remove any rust or patina through use.
To make your cleaning job easier, you might desire to consider giving your anvil a bath in vinegar to clean it off a scrap before you start. You lot'll need a big plastic tub with a lid, several bottles of vinegar, and likely an engine hoist or something to elevator your anvil upwardly. Place your anvil in the tub of vinegar, making sure it's completely covered, and let it soak with the lid on for nearly 48 hours. So information technology will be much easier to clean off with a wire brush after.
Don't worry near edges until yous've had a significant corporeality of experience with an anvil. If you really need sharp edges for your piece of work, it might exist easier to brand a hardie tool with adept edges instead. In fact, you don't actually want sharp edges equally they're more likely to flake and tin can also cause common cold shuts in your work.
You can besides put a light coat of oil or wax on your anvil to forbid farther rusting.
DON'T have sandpaper or a grinder to your anvil if you don't know what you're doing. If you mess upwardly the hardened top of your anvil, information technology will merely be good as a garden ornament! The steel face of your anvil is what provides information technology with decades of working life.
Don't even worry if the face of your anvil isn't perfectly apartment. Most old anvils are a bit concave (the depression is called a "swale"), and they'll work just fine. If you really need to straighten a piece of metallic, a block of wood and a mallet often does a better task anyway.
Fixing A Cracked Anvil
If you want to set up a cracked anvil, the basic steps you'll need to take are to sand information technology down, grind down the cracks a flake, and weld information technology.
You want to grind all the surfaces yous're going to weld to expose good, clean textile. Make sure to get into any fractured chips or folds.
If the fissure is 3D and goes more than than eight cm deep, your anvil is almost probable besides damaged to really be repaired into a good working country again. It'due south not going to be useful for your blacksmithing unless you lot were able to completely reforge it.
If your anvil only has a pocket-sized crack that you want to prevent from spreading any further, that's possible also. Y'all tin drill a hole at each end of the scissure and that should cease it from getting whatsoever worse.
Use a good build-up rod for welding. Avoid hard surfacing electrodes. If you lot put multiple layers of hard surface on your anvil, there'south a expert chance that pieces volition fly off your anvil while you lot're using information technology.
If you're non sure if your anvil is steel or cast iron, you can use a grinder to find out. If it gives off very few sparks it'southward bandage fe. If in that location are lots of sparks, so information technology's steel.
Heating Your Anvil
Before you weld your anvil, you want to heat it upward to between 350 and 450 degrees first. You can use a Tempil Stick to verify the temperature.
Lifting a full-sized anvil can be hard, so y'all can use a more portable tool like a propane-fired weed burner to estrus your anvil upwards.
Y'all can besides use a woods fire. But if you put your anvil directly into a fire, be sure to employ a wire castor to remove all smoke deposits and carbon earlier you weld information technology.
Be aware that the hardy hole and heel area of your anvil has a thinner cross-department and it volition heat faster than the larger and more solid areas.
Fixing Edges
When you lot heat up the border of your anvil it may reduce hardening, but that's fine.
Hardness ways you're more likely to chip your anvil during apply, so it'southward okay if your edge is a fleck softer. That'southward really probably preferred for new blacksmiths.
Fixing the edges of your anvil is pretty much the aforementioned process as filling in cracks.
Bring your anvil upward to around 350 or 400 degrees.
Weld your edges using a rod specifically made for building up worn parts on heavy equipment. These kind of welds volition have actually adept impact resistance.
Later you're done welding, you can pein the welds. This helps relieve some of the tension every bit the metal cools off.
One time the metal is cool, you can grind it flat and smooth. And finally give it a bit of a smoothen.
Cooling Down Your Anvil
Quenching your anvil can be hard and dangerous to do. You'd likely need a steel drum or something of similar size to exercise it.
A ameliorate option is to pack your anvil in vermiculite, which is made of crushed up mica. Y'all tin can find it at the bulk of garden centers and nurseries. It volition let your anvil to slowly absurd over about eight hours. That way there's less chance of stress swell and other bug every bit a effect of your welding.
Getting The Correct Finish
When you're starting off, utilise a 24-grit cup rock if y'all need to aggressively remove a skillful amount of metal. Be sure to hold it flat. Yous'll know it's flat if y'all've got sparks coming off both sides of the cup stone.
Afterwards an initial grind, move on to flex back metal sanding disks. You want to start at nearly 24 grit and work your way down to 240 dust over the course of 5 or vi steps.
Every bit I mentioned earlier, sharp edges can really be bad on your anvil as they're decumbent to chipping. And then I'd recommend using a 100 grit or finer sanding disk to radius the edges.
For final polishing, you can use a Scotch Brite disk. This will get your anvil so shiny that yous'll usually exist able to come across your reflection in it!
Potential Risks Of Repairing An Anvil
As I've said already, repairing your anvil isn't without risks. If you aren't careful, y'all could end upwards doing more than damage. Such as:
- You tin spend a lot of time and money and make your anvil worse off than it was originally
- Making the face more brittle and prone to cracking in welded areas
- Heating the confront of the anvil can ruin its temper in all areas in contact with the weld bead
- Edges of your anvil won't exist able to agree upwardly to heavy use and will start to flake out or deform
Only ultimately information technology's upward to y'all to determine if information technology's worth it.
Maintaining And Caring For Your Old Anvil
Hither are some things you can practice to keep your anvil in good condition for as long equally possible.
- It'south helpful to warm your anvil up a bit earlier using it. Cold metal is more probable to break when striking. If yous tin't keep your anvil in a worm room, then warm information technology upwardly by laying pieces of hot iron, a heat lamp, an electric blanket, or something similar on pinnacle to warm it up a bit earlier utilise. It takes a while to warm up a cold anvil, so don't wait this to be washed in just a couple of minutes. Also avoid heating your anvil higher up 250 degrees F, equally it could ruin the hardness of your anvil'southward confront.
- Use hammers that are softer than your anvil's confront. Hitting one piece of hardened steel with another can cause abrupt pieces of metallic to fly off of either your hammer or anvil. You can exercise some serious damage. Information technology's also generally a smart idea to avoid hit the confront of your anvil with a hammer directly. Peculiarly on the tips of the horn or on its edges. Keep some hot iron between your hammer and the anvil. Hot iron alone is soft and typically doesn't harm anvils. It'southward only when you hit the anvil confront with cold steel that information technology tin chip or break.
- Be specially conscientious on the very tip of your anvil's horn. These small areas are prone to bending, breaking, or mushrooming if they're repeatedly struck with heavy hammer blows. The edges of your anvil are also especially weak areas. All anvils will suffer some kind of edge harm over time.
- Generally you want to employ a hammer or sledge that's less than ane/50th the weight of your anvil. And then if you're using a 150 lb anvil, you don't really want to employ a hammer heavier than 3 lbs. Some people use a ane/30 rule instead of ane/50, but for beginners who aren't confident with their swing yet I'd err on the side of circumspection.
- You tin use WD40, wax, or similar items to go along your anvil rust-free and smooth. Anvils tin rust when they come up into contact with water or dampness if non protected. Nevertheless, sometimes an anvil that's too shiny and slick can be more difficult to use than one with a mild rust or patina on information technology.
- Leaving objects on your anvil can cause condensation during changes in temperature, specially in loftier humidity. Don't store items on your anvil when information technology's non in utilize. It can as well be a skillful idea to cover your anvil with a cotton fiber towel when not in utilise. A towel will continue grit, dust and other stuff off your anvil that could attract wet.
- You tin take out small dents and dings in the confront of your anvil by lightly hitting around them with the rounded end of a brawl pein hammer.
What If I Simply Want My Anvil For Decoration?
If you don't plan to utilize your anvil for actual blacksmithing and just plan to use it as a lawn ornament or for a table, then it doesn't really matter what you do to it.
Feel free to grind it down, sand it, or whatever you want to exercise to make it more aesthetically pleasing. It won't matter to you lot if yous maintain the hardness and temper of the anvil's face.
Y'all can also seal it with annihilation you want to prevent rusting and go along information technology looking shiny, even in outdoor atmospheric condition.
The only downside is that once you ruin your anvil for the sake of making it into a decoration, information technology can only always be a decoration. If you ever desire to re-sell it in the hereafter, it will accept less value since it likely won't serve much purpose for bodily blacksmithing at that point. To use it again, you'd likely demand to weld a new hardened steel face onto information technology.
Have you done whatever restoration work on your own anvil? Share the details in the comments section beneath!

Source: https://blacksmithu.com/how-to-repair-restore-old-anvil/
Posted by: goodopmenow.blogspot.com
0 Response to "Can Forged Anvils Be Welded To Repair Crushed Corners"
Post a Comment